

I looked into VPC because I wanted to configure all the outgoing traffic from Elastic beanstalk instances via a single public IP address. This allows me to identify TCP requests coming out of AWS EBs.
Configuring Elastic bean to have a static outgoing IP address
In order to configure this, we need to create a VPC in AWS and attach our EB environment to it. You cannot change/configure VPC for an existing environment, you'll have to create a new EB environment in your project.
Configuring the network
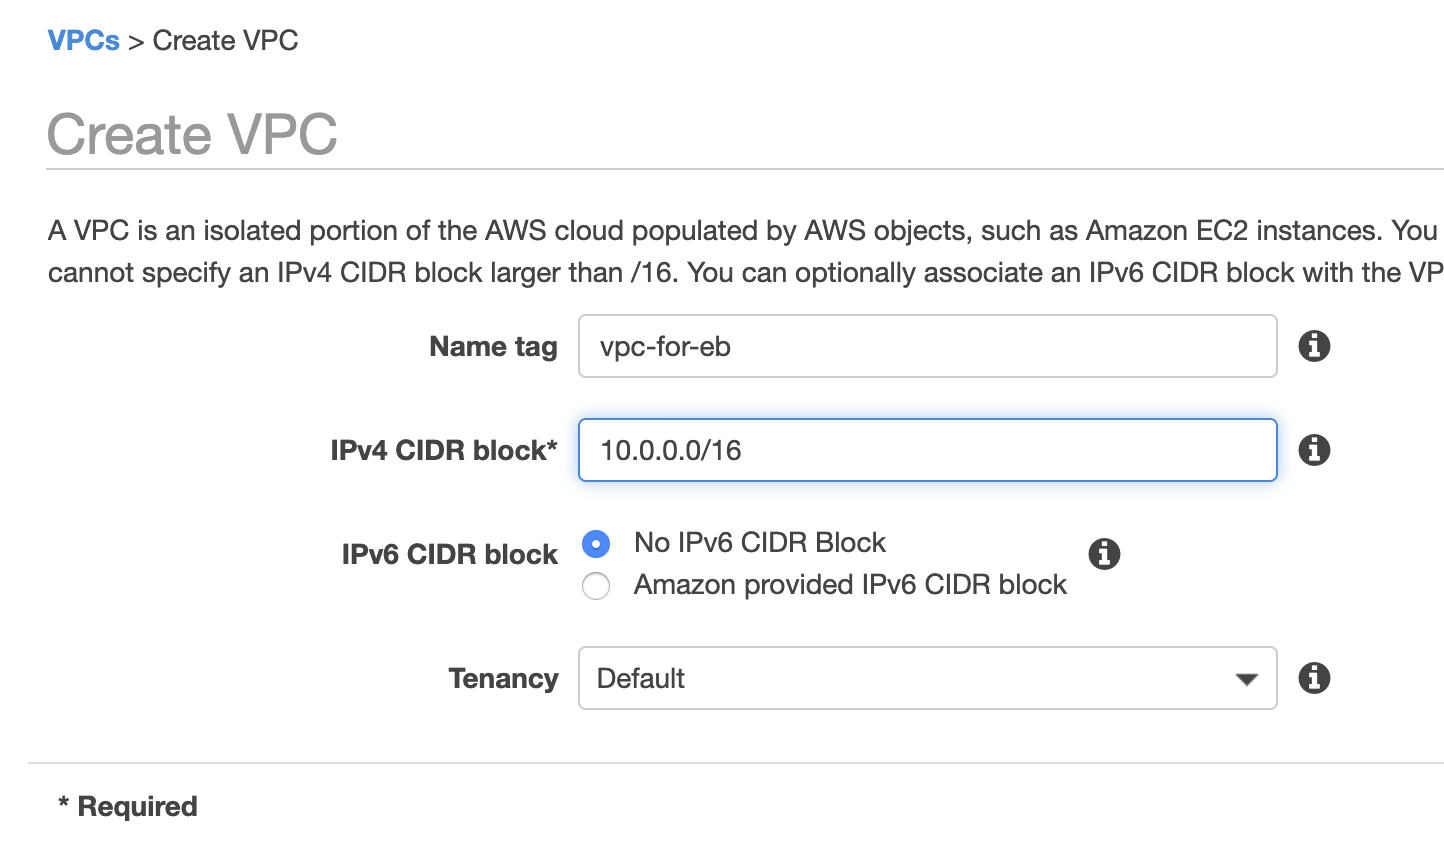
1. VPC
Go to VPC page under aws console and create a new VPC
https://us-west-1.console.aws.amazon.com/vpc/home
give a name tag and for CIDR block, give 10.0.0.0/16. this will allow us to use IP addresses from 10.0.0.0 to 10.0.255.255.
2. Subnet
Now, we need to create at least 4 subnets. We'll be creating both private and public ones. Public ones will be used for load balancers and Private for EB instances. Private subnets won't be exposed and will use NAT gateway for outgoing traffic. Public ones will be connected to Internet Gateway.
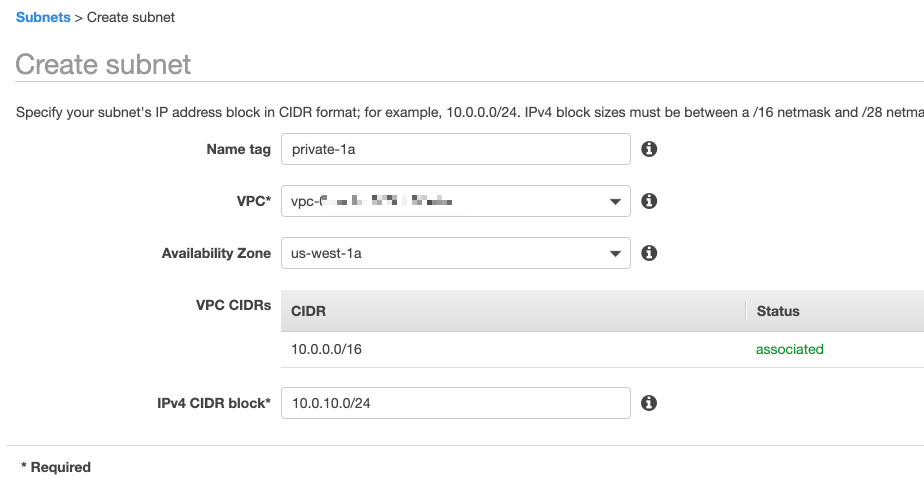
- 10.0.1.0/24
- 10.0.2.0/24
- 10.0.3.0/24
- 10.0.4.0/24
Each one can have 256 IP addresses under it.
We'll be using 10.0.1.x and 10.0.2.x for public and 10.0.3.x and 10.0.4.x for private. Give name tag according so that you can identify easily.
Make sure you select 2 different availability zones for private and same way for public. If you don't have multiple zones, load balancer will throw error during EB environment creation.
3. Internet Gateway
You just need to give a name tag here. Nothing to configure. Internet Gateway is what allows public traffic for the devices in the network. We'll be connecting public subnets to this gateway allowing load balancer to handle incoming traffic.

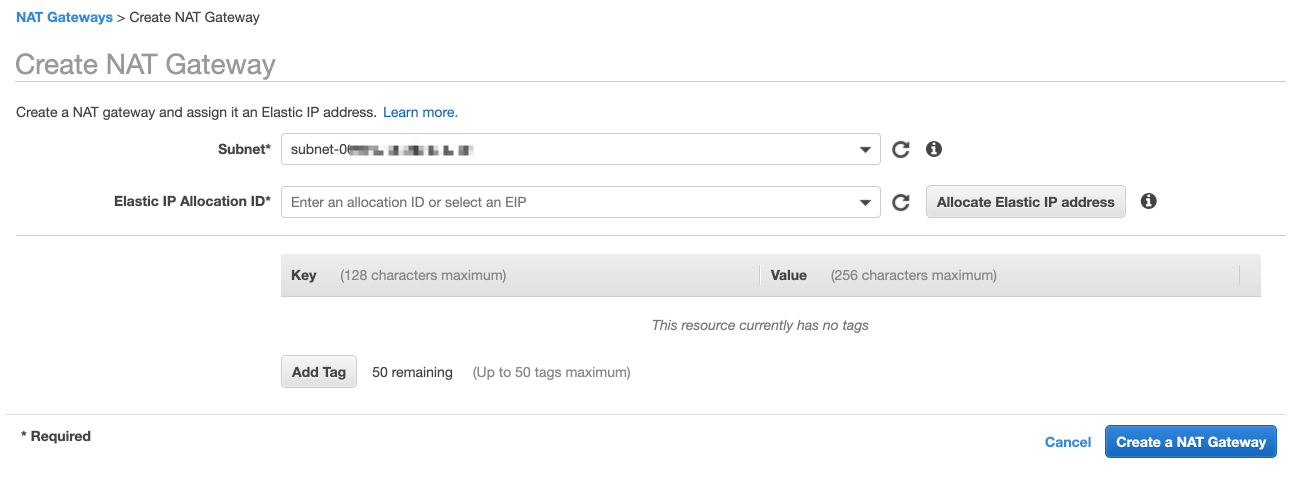
5. NAT Gateway
NAT Gateway is what allows internet access for the devices in the private subnet. For this, you need to have an elastic IP address. Make sure your account has EIP available. This will be the IP from which all the internet outgoing calls will be happening.
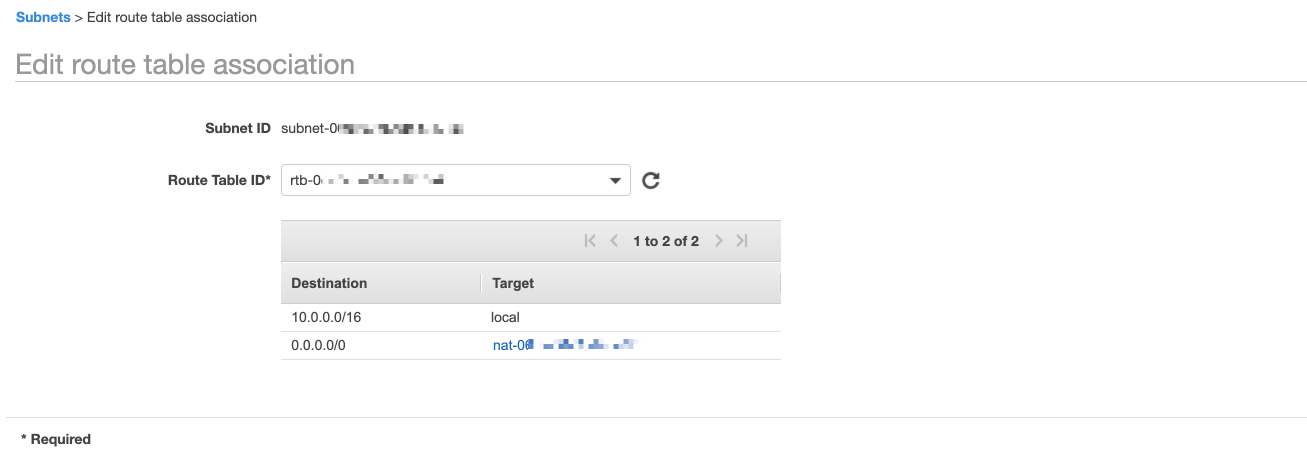
6. Route Table
We need 2 route tables. One for public subnets and one for private subnets.
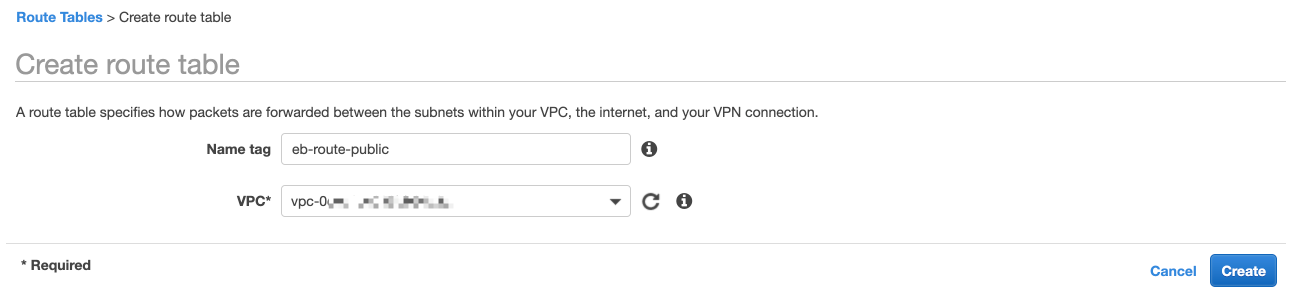
Give a name tag and select your VPC here.
- Connect Public route table to Internet Gateway that we created.
- Connect Private route table to NAT Gateway

7. Add Route Tables to Subnets
Now we need to connect private subnets to private route table and public subnets to public gateway.
8. All set.
You should be seeing something similar to following. If you notice some of the available IPs out of 256 would've been already used.

9. Go ahead and create your EB instance.
We are done configuring the network. Now we just need to select our new VPC during the creation of EB environment. You can follow this guideline to attach our configured VPC to EB environment
https://aws.amazon.com/premiumsupport/knowledge-center/elastic-beanstalk-static-IP-address/
